Pages

.

Announcing ‘Only’ Event For December & Giveaway

Hi!
December is a month of celebrations with Christmas and the  New Year coming up. This month surely is a month which invites more baking so I decided to keep this month’s event as ‘Only’ Cakes and Cookies. So, bake as many variety of new cakes and cookies and treat your loved ones in this festive month and send them across to me as I’m hosting the event this month.
image
 
For this festive month the book that has been sponsored as a giveaway by www.tarladalal.com is called ‘Cakes and Pastries’. It is a book that any baker would like to have in his/her library for the amazing collection of cakes and pastries that it offers.
Product Image
Rules for giveaway
This giveaway is open for everyone across the globe as long as you are able to provide me with an address in India as the books gets shipped only there.
For winning the giveaway the participants after sending the entry to me have to leave the link of the entry in my event announcement page and have to clearly inform me how you are eligible for it as you can increase your chances of winning either by
1.  following my blog publicly
2. become a fan on the face book page of my blog
or
3. By publicising this event through your space.
The winner will have to provide me (Pari) within two days of the winner declaration  an address in India with correct pin code and phone number, at cookingoodfood@gmail.com so that I can make arrangements for getting the giveaway delivered. If the winner is unable to contact me within two days, I’ll have to pick a new winner.
Rules of The Event
1. Any number of fresh entries can be sent but only 2 entries from the archive will be accepted. Archived entries to be reposted, else will not be accepted.
2. Only vegetarian dishes accepted (eggs can be used)
3. Use of logo is mandatory as it helps spread the word.
4. The entry should be linked back to my event announcement page.
5. The winner of the book from Tarla Dalal will be chosen by me by random. org at the end of the event from the links left in my event announcement page.
6. You can either leave the link in the linky tool given below or can send the entry to me at cookingoodfood@gmail.com in the following format
name
blog's name
blog url
recipe name
recipe link
pic  resized to 300pixel
7. I will post the round up within 7 days of event completion unless there's an emergency.
8. I can not win the giveaway as I'm  hosting it.
9. Non bloggers can also participate, in that case they can send entries to me and I can post them on their behalf.
Please submit you entries here.


reade more... Résuméabuiyad

Fresh/Raw Pigeon Peas Saaru…my first experience with the beans


DSC_0687-1
Hi.
Days here are quite gloomy as we are amidst heavy rains, one can see flooding all over and the city. Telephone and Internet services are badly affected. Commuting has become painful as one faces traffic jams and the roads too are in bad condition. The state government declared holiday for schools since Friday itself but the kid’s school seemed quite indifferent to all the chaos and was still functional. On top of it they also conducted the KET exam on Saturday and the parents were supposed to drop their kid to school.
Since S, was busy with his CEO it was my turn to drop the kid to school in the rains. My car’s battery was down so I had to drop him on the two wheeler and was thoroughly drenched by the time I reached home. Wading in the floods on the two wheeler where the road was not even visible was surely very scary. I simply followed the vehicles in front observing for any potholes and ditches. By the time I reached home I  already  had headache and throat pain. I decided to have warm food and nothing is more welcome than either some hot soup or saaru (rasam).

I had got hold of some fresh tuvar beans recently and the beans were peeled and ready to use. I was looking out to make something very interesting using the beans as this was my first time with them but at that moment when I was craving for something hot, I decided to use them in making a saaru. I made this saaru in the same line of my avarekaalu saaru with a little variation in the ground masala.
I was very sceptical about the taste as I had never worked with these beans earlier but I was extremely delighted Smilethat the saaru turned out very tasty and had a great flavour of the fresh beans. With hot rice and some ghee on top it made a very hearty combination. I’m ready to try out more recipes with these beans surely as my first experience turned out very successfulThumbs up. I wanted to post this on Saturday itself but the server has been mostly down because of  the rains.
DSC_0684-1
Ingredients
a cup and a half peeled pigeon pea beans/ tuvar dal beans
half cup grated fresh coconut
2red chillies
2tbsp coriander seeds
1/2tsp cumin seeds
1-1/2tsp tamarind paste
a sprig of curry leaves
1tsp mustard seeds
a pinch of turmeric powder
salt to taste
2-3tsp oil for tempering
finely chopped cilantro
Method
To make the fresh masala for saaru…
Grind to a paste using water, coriander seeds, red chillies, cumin seeds, saaru podi, coconut and a little cooked pigeon peas.
Wash the beans and then boil the beans in water and some salt till cooked.
Mix the masala paste to cooked beans. Adjust salt and mix the tamarind paste. Add enough water to get a saaru consistency (I added about 1 cup water).
Bring it to a boil and temper it with mustard seeds, turmeric and curry leaves.
Boil for 2 more minutes and then serve hot with rice or Chapati.
DSC_0679-1
Sending this to my event ‘Only’ Curries guest hosted by Kamalika and also MLLA41 guest hosted by Simona and is the brainchild of Susan. Also, reposting two of my favourite curries for my event
P1030718-1
P1060251-1


reade more... Résuméabuiyad

California Rolls


DSC_0657-1

Hi friends!

Today I was supposed to go out and shop with a blogger friend but all plans were washed off in the heavy rains. Since I had not planned anything majorly for today as I was surely looking forward to my shopping, I had some time in hand, so I decided to use it wisely.

Recently, during my visit to one of the finest bakeries here I came across a bread roll which had a seekh kebab filling. Looking at it, I had mentally made a note to try this one at home, the roll was named California. Since this is my take on that  roll  I decided to name it California Rolls.

Now patience  was surely not my virtue today as I was very hungry and I definitely had no intention of making seekh kebabs (those who are regular readers here will surely understand my penchant for making the seekh kebabs) as that would have taken a long time and I was already hungry so decided to make quick vegetable cigars and then coil the bread rope around them.

To my delight the rolls turned out super soft and amazingly tasty inside and the best part…they looked beautiful. The only expertise the rolls will call  for is surely in making the outer rope for the roll, and turning it around the cigars as that needs a light and quick hand, the rest of the preparation  is a extremely simple.

DSC_0669-1

DSC_0674-1

Ingredients For Vegetable Cigars ( makes 8-10)

200gms cottage cheese (paneer)grated

1 small carrot grated

3green chillies finely chopped

1/2 capsicum finely chopped

1onion finely chopped

1potato boiled and grated

bread crumbs

a pinch of cardamom powder

a pinch of garam masala

2tsp coriander powder

2tsp oil

Ingredients For  Bread Rope

2cups APF

2tbsp oil/butter

1-1/2tsp active yeast

2tsp sugar

3/4cup warm milk

1tsp salt

Egg wash/ Milk wash

Method For Making Veg. Cigars

Heat oil and sauté onions and green chillies. Mix in the carrots and add salt to taste.

Once the veggies have released water, add grated paneer (cottage cheese) and capsicum.

Toss in for a minute.

Mix in grated potato and the spices.

Cool and add enough bread crumbs that will help binding easily.

Make 3inch long and half inch wide cigars, tapering at ends and shallow fry lightly in oil. Cool.

Method For Making Bread Ropes

Proof the yeast in warm milk along with sugar.

In a food processor with the help of kneading attachment make a dough using all the ingredients.

Knead for 7-8 minutes and let it rest in a greased container till it doubles in volume. ( a detailed post on working with yeast can be read here)

Punch down the dough and knead again.

Take a ping pong ball size portion of the dough and with help of all the fingers roll a rope about 15 inches in size. This needs practice. Apply pressure in the centre and then move towards the ends.

Apply water on the rope and then wrap it in a coiled manner along the cigar leaving the ends of the cigar open. Let the ropes rise again for 10-15 mins. Apply an egg/milk wash.

Bake in  a preheated oven at 180C for 15mins or till the crust turns golden in colour and gives a hollow sound on tapping.

Serve warm.

DSC_0659-1


reade more... Résuméabuiyad

Makhani Rajma…Kidney Beans in a Makhani Gravy


DSC_0634-1


hi!

Makhani gravy is one of the most popular gravy’s from North India. I make various versions of this gravy and one can check out more options here and here.

Today I’m posting an extremely delicious and finger-licking curry which my family thoroughly enjoyed. If you enjoy restaurant style food, this gravy is a must try. S loved it to the core and demanded more of it. Sadly I could not provide him more as whenever I try something new I make a small batch and if we like it  I make more again. Surely the next time I make this I will make it more.

The gravy is delicately flavoured and is a winner in itself. I used rajma/kidney beans to bring about some innovation and I must admit that the beans go very well with this gravy. It’s an excellent side dish for a north Indian party.

To read step by step, how the basic makhani gravy was made, read here.


DSC_0635-1

Ingredients

basic makhani gravy

a cup of cooked kidney beans

2tbsp of cream for garnish

powdered roasted kasoori methi

Method

Take the basic makhani gravy (prior to adding cream) in a pan and bring it to a boil. Add the kidney beans and cook on low flame. Now add the cream and switch off the flame.

Garnish with cream and powdered kasoori methi.

Serve hot with Naan or Jeera Rice.

DSC_0640-1

Sending this to my event ‘Only’ Curries guest hosted by Kamalika and also MLLA41 guest hosted by Simona and is the brainchild of Susan.

reade more... Résuméabuiyad

Happy Children’s Day with Masala Tofu Tikka Pizza


DSC_0609-1

Hi Everyone!

I am happy with myself as it seems that finally my grey cells have started functioning normally. Kindly do not believe that I was insane all these days, LOL, it is just that I was not able to innovate anything interesting and I kept on telling myself that things will improve and that my brain will come back to normalcy and to my delight it did happen!

I am extremely elated that people loved my last post on Crispy Salsa Cubes. Moving in the same genre of fusion cooking, today. I’m posting a spicy ‘chatakhdaar’ pizza with a desi touch. Pizza, as we all know is an Italian preparation and has now become extremely popular with every one especially, the kids. Today being children’s day, I thought of treating the kid with this fusion Pizza. He loved it to the core and carried it in his lunch box too but he was terrified with the thought that his friends would not let him eat it…. I convinced him that he would get his share as all mom’s would have sent a delicious lunch box today.

P1060904


So, for the fusion lovers, the recipe goes like this…

Ingredients (makes 4 Pizzas)

For Tofu Tikka

200gms silken tofu (cut into cubes)

1/4 onion cubed

1/4  of each capsicum cubed (green, yellow, red)

1/2cup thick curds

1-1/2tsp ginger-garlic paste

1tsp chilli pwd

1tsp cumin pwd

1tsp coriander pwd

1/2tsp mint pwd

salt to taste

1/4tsp rock salt

a pinch of cardamom

2tsp mustard oil

oil for grilling

For Masala Sauce

3 onions minced

6-7 garlic pods minced

a large piece ginger minced

5-6 medium tomatoes minced

salt to taste

2tsp coriander pwd

1tsp cumin pwd

a pinch of cinnamon pwd

2tbsp curds

2tsp red chilli pwd

1/4tsp turmeric pwd

a large pinch kasoori methi

a pinch of cardamom pwd

Other ingredients

200gms grated mix of two cheeses (cheddar + mozzarella)

chilli flakes

4 whole wheat pizza base

mild garlic oil

Method

For Tofu Tikka

Wash the tofu and cut into cubes.

In the thick curds, mix all the spices and ginger-garlic paste. Now, mix all the cubed veggies and cubed tofu. Marinate for half an hour.

Grill the veggies and tofu on a grill pan using a little oil. Keep the grilled product aside for later use.

For the Masala Sauce

Mince the onions, ginger and garlic together in a food processor with the chopping attachment.

Mince to tomatoes too.

Heat oil and tip in the bay leaves. Now add the onion mince and sauté nicely till golden in colour.

Now add the minced tomatoes and mix. Cook well.

Once the tomatoes are cooked, season it lightly with salt (the cheese on pizza also has salt). Add the turmeric, chilli pwd, cumin-coriander pwd, cinnamon and cardamom pwd.

Add 2spoons of curds followed by kasoori methi. Cook for a minute and check the consistency of the sauce. Add enough water to bring the sauce to a spreading consistency and bring it to a boil again. Cool the sauce.

Assembling the Pizza

Lightly brush the pizza with garlic oil.

Spread the masala sauce, leave the edges.

Arrange the grilled veggies and tofu on the pizza.

Spread the grated cheese on top of it.

Bake in a preheated oven for 4-5mins at 240C or the highest temperature in your oven, till the cheese melts and starts turning light golden in colour.

Cut into wedges and serve hot.

DSC_0614-1

reade more... Résuméabuiyad

Crispy Salsa Cubes…a delicious starter


Hi all!

Thanks for all the wishes that you wrote for me, I’m feeling much better now.

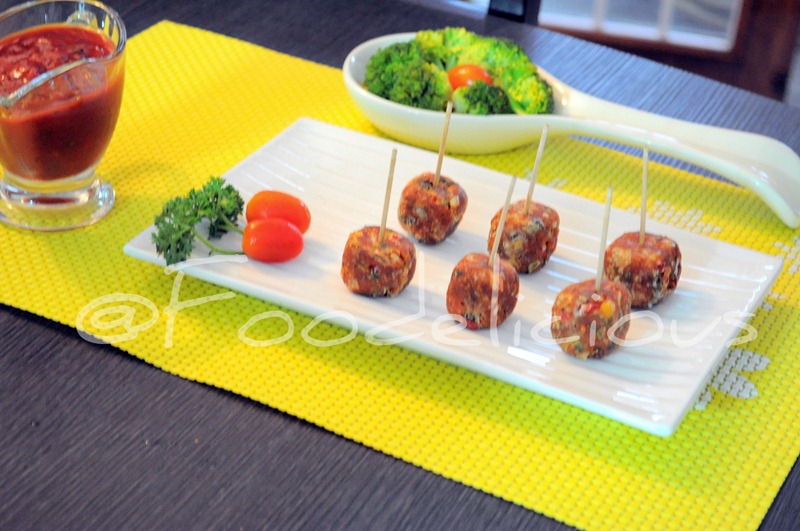
Today I’m posting a very quick to make starter which is extremely tasty and was loved by my family. The original recipe is from a cookery show and I had managed to pen down the recipe. In the original recipe once the basic starter was made many more sauces and chips were added and I personally found it messy to be served especially when one believes that the starters are finger foods and should be less messy. I have improvised the preparation in my way and the end product, of which I was very sceptical, turned out really good, so I thought of sharing it with every one.

These were perfect starters and had all the wow factor in them. These are crispy, crunchy, with flavours exploding in the mouth and the best part, can be made in a matter of few minutes if you have the roasted tomato salsa ready. Fortunately I had mine so this starter was ready in a matter of few minutes and I served it some salad.

In case you are using a ready made salsa sauce just check sweetness of the salsa and adjust the spices accordingly as the Indian palate loves to have a bit of spicy food… In case you love it sweet then just let it be..

(Recipe adapted from a cookery show)

Ingredients (makes about 2 dozen)

3cups fresh bread crumbs

4tbsp roasted tomato salsa

1small onion chopped

1/4 quarters of each finely chopped (red, green and yellow capsicum)

1green chilli finely chopped

2tsp red chilli pwd

2tsp coriander pwd

3-4tsp corn starch

some chopped cilantro

salt to taste

&

Oil for deep frying

Method

Chop the veggies finely as they will bind easily then in the mix and will not come out while frying.

P1060844

Run slices of 8-10 bread slices in a mixer to get fresh bread crumbs.

Mix the veggies and bread crumbs and add the salsa gradually into it, this will ensure that the mix is moist enough to bind and not overly moist else it will break while frying.

P1060846

Add the chopped cilantro.

P1060847

Mix in spices, salt to taste and mix thoroughly.

P1060848

Make small balls. Press each ball between the thumb and the next finger. Now press the sides. Shape these into cubes.

P1060849

Roll the cubes in corn starch and deep fry on a medium flame till crisp from all sides. Handle the cubes delicately while turning.

P1060851

Remove the cubes on an absorbent kitchen towel.

P1060852

Serve with salad and sauce. I used the salsa only Smile.

DSC_0594


reade more... Résuméabuiyad

Alasande Palya…Karnataka Style Long Yard Beans and the WINNER OF OCTOBER is..

DSC_0516

Hi everyone.

Days are passing by and we are kind of getting used to the city but still deep in my heart I long to go back and I keep praying almighty to help us on that.

This week has been terrible for me, all of a sudden I picked up a severe nerve pain in my right hand making me difficult to hold things, so cooking took a back seat. S was kind enough to take me out for dinner and we enjoyed eating Chinese Food at ‘The Cascade’.


I somehow managed to come out of the hand pain but my throat was hit. I am down with severe tonsillitis which has caused  fever as well as body pain. The weather here is playing hide and seek, we have rains followed by sunshine and then again the rains…I guess it is the change in temperature that caused an infection. I was getting extremely bored lying down as I am used to a more hectic lifestyle so I decided to post this simple dry curry which is an all time favourite with us.

This curry has been lying in my drafts for a long time and I actually wanted to post it in my other blog Kitchen- Basics as it’s a day to day curry and is easy to try for the beginners but with the current event on Curries going on in this month I decided to post it here.

It’s a quick curry to make and goes well with rice or roti accompanied by Jeerige Kattu. It is made by using the Palya Pudi ( traditional curry powder) which is red in colour and therefore it is also called red palya (dry curry) at my place. Long yard beans are a favourite with all of us and I cook it in many ways, one of which is this..

Ingredients (serves-4)

a large bunch of long yard beans chopped

2-3tbsp Palya Pudi

oil for cooking

salt to taste

1tsp mix of urad-chana daal/lentils

1/2tsp mustard seeds

Method

Wash the long yard beans thoroughly and pat dry with a clean kitchen towel.

Cut and remove the edges, now chop the beans.

Heat oil and mustard seeds, once the seeds splutter add the mixed lentils.

As you see the lentils turning golden in colour add turmeric powder followed by the chopped beans, mix well.

Season the curry with salt, mix well, cover and cook on low flame till half done,

Add the palya podi and mix again. Cover and cook till done.

Sending this to my event ‘Only’- Curries guest hosted by Kamalika.

DSC_0515

Sending this to my event ‘Only’ Curries guest hosted by Kamalika and also MLLA41 guest hosted by Simona and is the brainchild of Susan.

I picked up the winner from the links left in the October’s giveaway page and the winner is from comment no. 23, Kalyani . Congrats Kalyani, pls email me your address and phone number at cookingoodfood@gmail.com in the next two days, else I will have to pick a new winner.

image


reade more... Résuméabuiyad