Pages

.

Showing posts with label Kitchen - Basics. Show all posts

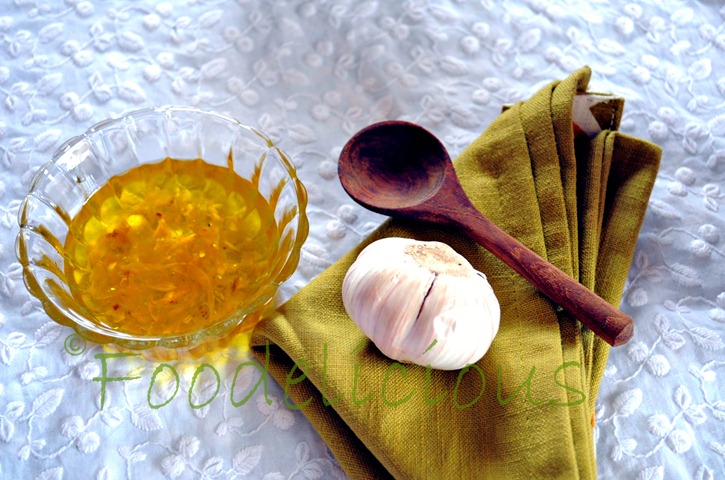
Garlic Oil..Home Made

DSC_1477-001
Hi!
My family loves Garlic Bread. Whenever we visit a Pizzeria or an Italian restaurant, the first order has to be garlic bread. The garlic bread available in restaurants makes use of butter, which makes the calorie count go high. So to make the garlic bread healthier and still tasty I make this garlic oil at home.Using this oil, the garlic bread can be made in a jiffy and what’s better is that it’s low in calories too.
 
 
This garlic oil can be used in making other salad dressings too and is quite multi purpose. It stays well for a month in refrigerator provided it doesn’t get over before that. It’s a no effort garlic oil which comes out very handy in cooking and is quite economical as compared to the garlic oil available in market.
 
Ingredients
7-8 thick cloves of garlic
1/2cup EVOO
Method
Crush the garlic in a clean pestle and mortar.
Push the garlic into a bottle and pour  the oil too. Close and shake lightly.
Leave it over night and the garlic oil is ready to use the next day. The flavor of the oil gets better as the garlic gets completely absorbed in the oil in the days to come .
Store in air tight bottle/ jar in refrigerator and outside for a week.
DSC_1473-001
reade more... Résuméabuiyad

Jeerige Kattu- Version I ( Traditional Karnataka Style Jeera Daal)


DSC_0534

Hi!

Today I’m posting a traditional Kannadiga preparation which is very popular at my place. It is an excellent accompaniment with spicy curries and is S’s and my elder son’s favorite. In recent days now that the elder son was around, I made this several times for him.

It’s an easy lentil preparation has a strong aroma and flavor of Jeerige (cumin seeds/ Jeera). The word kattu in Kannada means daal from which all the excess water has not been removed, basically it is the excess water in which the daal has been cooked. Ideally it should be a thin lentil preparation which resembles a lot to the rasam but my family likes it a little thick. I made it along with Alasande Palya and Aloo Gadde Hurda Uperi which are again  family favorites and  I’ve posted them earlier. This daal can be just had in a bowl in the winter as a soup too.

Ingredients

2 katori cooked tuvar daal

1/2-3/4tsp turmeric

2tsp cumin seeds

3-4 green chillies finely chopped

1tsp ginger chopped

1tbsp coriander leaves chopped

1tsp cumin pwd

salt to taste

oil for cooking

Method

Cook tuvar daal in a pressure cooker with a pinch of turmeric and a drop of oil. Both turmeric an.d oil help cook daal faster.

Let the pressure drop, remove the daal and mash it.

Heat about 2tbsp oil in a pan and once it is hot, lower the flame and add cumin seeds. This prevents the cumin from burning and turning black in color.

Once the cumin has spluttered add chopped green chilies, chopped ginger, coriander and saute for a few seconds.

Now add the cumin pwd, cooked daal and mix properly. Season the daal with salt and add about 1-1/2cups water.

Bring the lentil/daal to a boil and simmer.

Let it boil for 7-8mins.

Serve hot garnished with ginger juliennes.

I personally love this daal with a dash of lime.

DSC_0546

Sending this to my event ‘Only’ Vegan Cooking hosted by PJ at Seduce Your Tastebuds and to Home Maker’s Diary e Giveaway sponsored by Cuponation.

reade more... Résuméabuiyad

How To Make Restaurant Style Makhani Gravy For Curries, Step by Step


DSC_0631

Makhani sauce, as the name suggests is a sauce made in makkhan (butter). It is a delicately flavoured sauce which has a taste of tomatoes, aromatic spices, butter and cream.

It’s a rich gravy, loaded with calories but extremely flavourful and very popular. One can find it dominating the menu cards of any Indian Restaurant serving North Indian Food. As a child it was my favourite and now it is my kid’s. I make both the low and high calorie version of it but here I’m sharing the high calorie version. If you want to try a low calorie version, check here.

This sauce is popularly used to make paneer (paneer makhani), dal (dal makhani), vegetables (veg makhani). One can check out my innovation with this sauce here.

Ingredients For Sauce ( serves 2-3)

2tomatoes

1onion

1green chili

7-8 cashew nuts

a small piece stone flower

2 bay leaves

2 cloves

2 green cardamom

1  black cardamom

a small piece of mace (javitri)

1tbsp butter

1tbsp oil

a pinch of sugar

1/4 cup fresh cream

a pinch of roasted kasoori methi (powdered)

Method

Soak the cashew nuts in warm water for half an hour and grind to make a smooth paste.

Boil onion, tomatoes and green chilli together. Cool and grind to a smooth paste.

Mix butter and oil together in a pan and heat them. Add all the whole spices and sauté on low flame. This allows the spices to release their oils in the oil.

Add the cooked onion-tomato-chilli paste.

Sauté till oil separates.

Add the coriander, red chilli, turmeric powders and mix.

Add the cashew nut paste, mix and cook.

Pass the cooked gravy through a mesh to remove the whole spices and to get a smooth textured gravy.

Add half cup water to the gravy and bring it to a boil.

Switch off flame and mix the cream (leave half a spoon for garnishing).

The makhani gravy is ready. Sprinkle the kasoori methi and use.

DSC_0629-1

reade more... Résuméabuiyad

How To Make Frozen Peas At Home

Hi Friends.

Today I share another important technique used in the kitchen for storage, that's freezing. In this fast moving, hasty world we tend to use many frozen products as they come out handy. Freezing helps us store seasonal vegetables for a longer time and one of the most commonly used  frozen vegetable  is Peas. The peas made in this way can be stored in the freezer for an year. My mom used to make frozen peas  and now I follow the same trend and make them in winter when one gets peas at a cheaper rate (helps me save a few hundreds in the year).

The procedure is very simple..

Ingredients

Peas shelled

water for cooking

a large pan

Thick towel

zip lock bags

slotted ladle

Method

Take a pan and take enough water in that. Once the water starts boiling add the shelled peas (do this in batches, I made about 8kgs).

P1020231

P1020232

Once the peas are blanched you will see them moving to the top surface and floating there, remove them.

P1020233

Once the entire batch is done, spread it on  a thick clean towel and allow them to cool.

P1020234

Once cooled, fill them in washed and dried zip lock bags and place them in the freezer.

P1020235

Once frozen they can be thawed and used.

reade more... Résuméabuiyad

HOW TO WORK WITH YEAST IN WINTER


P1040216P1040217

Hi!

First of my apologies for not updating this blog for quite sometime. Today I am posting something very crucial for all the people who love working with yeast.

Yeast can be fun to work with in summer but it became a challenge for me while I lived in North India during winter. Hence I thought of writing this post..

When the temperature drops the yeast takes a long time to rise and since I faced that problem I started asking my friends what methods did they use to work with yeast during winter…

I got to know many options which even I was using but did not help me to my satisfaction, for instance.. keep the dough near the gas stove or preheating the oven etc. I then wrote to Katy of Food For Hungry Soul  stating my agony with yeast and she was kind enough to write back to me in great detail. Thanks so much Katy, I am putting the suggestions she had made through her mail here for every one to read.

  • The first thing is to turn the pilot light on in your oven, and set a steaming hot bowl of water in the bottom of your oven.  Put your covered bowl of dough on a rack over the bowl of water and close the oven door.  Enough warmth should be generated between the bowl of water (which may have to be changed a couple of times during rising time to keep it hot) to raise your dough.The dough may be a little moist on the bottom from using this method, but if it's the first rising, it should be okay as you can add more flour when you form it for the second rising.
  • The second method is to gently warm your oven on the lowest possible heat setting and then immediately turn the oven off.  Put your covered dough into the oven and close the door.  This method can be a little tricky if you have let your oven heat too long, but generally works well if you are attentive.
  • The last method  is a variation of the first method, especially for the second rise.  Set your prepared pan of bread dough over (but not in) a bowl of hot water on stove top (or on kitchen table in the direct sunlight), cover it so that the covering does not touch the dough (you may have to make a tent somehow. Use tall drinking glasses and a clean white dish towel). If your pan of prepared dough is too small to sit atop the pan of water, set a cooling rack over the pan of hot water and then your pan of prepared dough.

I liked Katy’s idea of using warm water bath but since it required replacing the water again and again as it would cool down fast in winter and I am not a very patient person, so my hunt for my kind of method was still on.

I finally sat down to read the manual of my microwave oven. Now, I do have a good microwave oven which not only has convection but also has steaming, grilling and broiling facility too. While reading the manual I realized that the oven can be set in temperature range for a time period of your choice. I thought this should solve my problem and for trial  I set my oven in  a temperature range of 40C-50 C for half an hour and checked it’s temperature using a thermometer  after half an hour,  was extremely happy to see that it worked.

Using the above mentioned method of setting the temperature of the oven, I made the sweet chelsea buns and after kneading the dough I kept it to rise in the oven which was set in the temperature range 40-50C for an hour and I got a raised dough in 35mins. This method is very safe and convenient as there is no chance that the oven will get overheated at the same time it does not need one to be constantly vigilant. Once you have kept the dough to rise and set the timer, one is free to complete other chores. It is a great method for people like me who do not have loads of patience.

One could use any one of the methods mentioned above as per their convenience for a faster working with yeast.I hope all the yeast lovers would find these method easy to try. At the same time if you have any further suggestions, please leave me a note in the comment box. Will surely update this post with more methods that I get to know.

reade more... Résuméabuiyad