Pages

.

Showing posts with label Sweets And Desserts. Show all posts

Eggless Pina Colada Cake


          Pina Colada Cake, most of us are very familiar with this flavor, if not, it's a cake bursting with tropical flavors of coconut and pineapple, well, this was our challenge, this month, for Eggless Baking, it was suggested by Meena of Chettinad Fiesta. It's basically a sponge cake frosted with pineapple mousse, coconut and mascarpone cheese, the process might look a bit long, but the end result is worth all of it. The original cake recipe here, uses rum, coconut liquor and eggs, I have replaced eggs with condensed milk and orange juice and left out the alcohol. I have made cakes, using condensed milk alone which gives a dense cake and orange juice alone which gives a airy and super spongy cake. For this cake I have used both of them, because I felt that if I used orange juice alone, the cake would be very light and might weigh down with the frosting. Since the frosting has coconut, cheese and fruits, it has to be refrigerated, if you like the drink Pina Colada or cheese frosting or white chocolate, then this cake is for you, because the frosting tasted a little bit like all of the above..

Need To Have
For The Sponge Cake

  • All Purpose Flour/ Maida - 1 cup
  • Condensed Milk - 1/2 cup
  • Orange Juice - 3/4 cup
  • Oil - 1/4 cup
  • Baking Powder - 1 teaspoon
  • Baking Soda - 1/2 teaspoon
  • Vanilla Extract - 1 teaspoon
  • Salt - a pinch

For The Pineapple Mousse

  • Chopped Pineapple Pieces - 2 cups
  • Sugar - 1 tablespoon
  • Corn Flour - 1 teaspoon

For The Coconut Cream, Cheese Frosting

  • Coconut Milk - 200 ml
  • Sugar - 1/4 cup
  • Mascarpone Cheese - 6 tablespoons
  • Cream Cheese - 2 tablespoons
  • Corn Flour - 2 teaspoons
Additionaly Needed
  • Orange Juice - 3 tablespoons
  • Grated Coconut - 1 to 2 cups 

Method
Sponge Cake


          Take the oil, condensed milk, orange juice, vanilla extract and salt and beat well.


          Sift the flour, baking powder and baking soda and add to the wet ingredients and mix it well.


          Pour it in a greased and floured pan and bake it at 180 C for 35 to 40 minutes, remove and cool the cake.

Pineapple Mousse


          Take 11/2 cups of the chopped pineapple, add the sugar and 1 cup of water, mix and cook it covered for 1/2 an hour.


          Mash it slightly, add the remaining 1/2 cup pineapple pieces and the corn flour mixed with little water. Mix everything together for about 5 minutes till you get a jam consistency, remove and cool it.

Coconut Cream Frosting


          Take the coconut milk and sugar in a pan, and cook on  medium heat for 15 to 20 minutes, till it thickens, it should coat a spoon dipped in it, keep stirring it all the time.


          Cool it, then add the mascarpone and cream cheese and whip it well, using a electric blender, since the mixture was a little runny, I added 2 teaspoons of corn flour and whipped it, cool it for about 30 minutes, it'll be easier to do the frosting.
You can refer for homemade mascarpone cheese here and homemade cream cheese here.

Frosting The Cake


          Slice the cake into 3 layers. Take the bottom layer, pour about a tablespoon of the orange juice, allow it to soak, then put half of the pineapple mousse, then layer with the coconut cream frosting, then place the next layer, repeat the orange juice, pineapple and coconut cream, place the third layer, add the orange juice and frost it fully with the coconut cream, just enough for the grated coconut to stick to it. Press the grated coconut all over the cake. Refrigerate the cake for at least an hour and then slice it and serve.


Note
I have not used 2 cups of grated coconut, used about 1/4 cup only, wanted to cut down the calories, if doing it for a party, then layer it well with the grated coconut, it gives the cake a beautiful look.
You can avoid the sugar in the pineapple mousse, the pineapple that I used was not that sweet, so I added 1 tablespoon of sugar to it.
The sponge cake, if eaten alone will need another tablespoon or 2 of sugar, but with all the frosting, it tasted perfect.
I have used a 5" spring form cake pan, the pan is deep, so it took me about 40 mins in the oven and also the cake could be sliced into 3 layers.
reade more... Résuméabuiyad

Coconut And Condensed Milk Ladoos


          Coconut Ladoos with Condensed Milk, this is one of the easiest desserts that one can make, yet tastes so delicious. It can be put together in under 10 minutes, if you had all the ingredients, well to say it more accurately, just 2 ingredients, coconut and condensed milk and the process, if you can call it one, is so very simple..

Need To Have

  • Condensed Milk - 1/4 cup
  • Grated Fresh Coconut - 11/2 cup

Method


          Take the coconut in a heavy bottomed pan and toast on medium heat for 4 to 5 minutes till you see that it is dry and turns from white to a light yellow,creamy color, remove. To the same pan add the condensed milk and 1 cup of the coconut, reserving the rest for the last step and mix them well.


          Keep mixing for 3 to 5 minutes, till it comes together like a ball. Switch off, cool it slightly, grease your hand with a little ghee and make the ladoos ( balls ), rolling it between your palms. Roll the ladoos in the reserved coconut till some of it sticks to the ladoos, remove and enjoy.


Note
I have used fresh coconut, you can use desiccated coconut, in that case skip the step of toasting the coconut.
I have not added any additional flavor, I like the flavor of the coconut and condensed milk, if you want you can add some powdered cardamom.
I got 9 small lemon sized ladoos from the above measurements.
The 400gm condensed milk contains approximately 11/4 cups of condensed milk, if you're using the whole can, add about 5 cups of coconut.
Pulse once or twice in a blender, the reserved coconut for the last step, so you'll get an even sized mixture to roll the ladoos with, but don't make it into a fine powder.
You can have the refrigerated ladoos, as such, or bring it to room temperature.
reade more... Résuméabuiyad

Mysore Pak/ Besan Flour Fudge


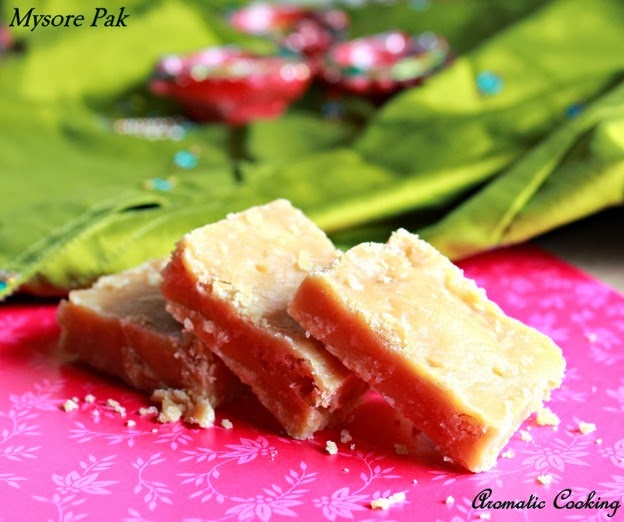
         Diwali is going to be here in just two weeks time, and I know many of us are busy, be it preparing sweets and savories or buying clothes and gifts for the family. I am also seeing lots of festival recipes in the other blogs too, so today I thought I'll post a sweet recipe, Mysore Pak. The main ingredient here is besan flour/ chickpea flour, ghee and of course sugar, and there are two varieties of this very famous sweet, the soft burfi type and the other semi-hard one. I like both of them, but the semi-hard one is a little more special for me. Though the ingredients are simple, the process is a little tricky, which I think one can master with practice. I have watched this video of Vahchef so many times and every time I am fascinated at seeing the finished mysore pak at the end, so perfect with the famous honeycomb texture. I have tried to make it, I know I have not done it perfectly, I am sure, the next time I'll do it even better, but for the first time, I am happy with the result..

Need To Have

  • Besan Flour - 3/4 cup
  • Ghee - 1/2 cup
  • Oil - 1/4 cup + 2 tablespoons
  • Sugar - 3/4 cup

Method


          Heat the 2 tablespoons of oil and add it to the besan flour, when you add it you'll here a sizzling sound. Mix it with the flour to get a crumbly mixture. Then sieve it to remove any lumps.


          Add the sugar and 1/4 cup water in a heavy bottom pan and heat it, at the same time heat the ghee and the 1/4 cup oil in another pan and keep it ready.


          When the sugar is completely dissolved, keep stirring till you get the 1 string consistency, when you take the spoon from the sugar, it should form a sticky string and it will be bubbling. at this stage, add the besan flour, little by little and keep mixing continuously till you get a smooth mixture. At the same time, heat the ghee and oil mixture, add the hot ghee to the flour mixture, a spoon at a time and keep mixing with the other hand, do this till all the ghee is done and the flour mixture starts to leave the sides of the pan and tending to solidify.


          Remove it and pour it immediately in a greased plate, wait for 5 minutes and slice it into pieces. Wait for another 10 minutes till it's fully cooled, then remove the slices carefully.


Note
When you add the ghee mixture, it should be really hot, when you add it to the flour, it should foam up.
The mysore pak came out well, but I made a mistake of using a shallow plate when I poured the final mixture, it should be a little deeper, at least 2 inches, that way you can get the honeycomb texture very nicely. My pieces were only about 1/2" to 3/4" tall.
You can add another 2 tablespoons ghee, if needed, I felt the above measurements are good enough.
While sieving the flour, keep pressing with a spoon, because it'll be sticky from the oil added and will not fall through easily.
reade more... Résuméabuiyad

Besan Laddu, Bengal Gram Flour Laddu


          Besan Laddu/ Gram Flour Laddu, I have made this only once, long time back for one Diwali, I guess. Though it came out well and tasted really delicious, for some reason I didn't do it again. This is the second time, this is an extremely easy and yet at the same time really very tasty laddu. It just needs four ingredients and takes under 30 minutes, at the end of which you have 25 laddus, very flavorful from the ghee and cardamom added..

Need To Have

  • Besan Flour/ Gram Flour - 2 cups
  • Powdered Sugar - 11/2 cupc
  • Ghee - 2/3 cup
  • Cardamom Powder - 1/2 teaspoon


Method


          Heat the ghee, add the gram flour and roast on reduced flame for 8 to 10 minutes, till you get a nice aroma and the raw smell of the flour disappears.


          Remove add the sugar and cardamon, mix it and cool it slightly. While it's still hot, using your hands, roll into small balls firmly and keep. Cool and store it.


Note
The mixture should be slightly warm, then only you can make laddus.
If it gets cold, heat it very lightly and then make the laddus.
I used 21/2 cups flour, 2 cups sugar and 2/3 cups ghee, but you can stick to the above given measures, so that it'll be easy to make your laddus.
reade more... Résuméabuiyad

Apple Kheer, Apple Payasam


          Apple Kheer/ Payasam, I had been wanting to try out this dish for a long time, and in spite of always having a stock of apples in hand, I never got a chance to make it. What better time to make it, than now, during Navarathri. It needs very few ingredients that's always in your pantry, very easy to prepare and it tastes really good..

Need To Have

  • Apple - 1 medium
  • Milk - 3 cups
  • Sugar - 4 tablespoons
  • Green Cardamom/ Elaichi Powder - 1/2 teaspoon
  • Chiroli Seeds - 1/2 tablespoon

Method


          Boil the milk till it reduces to half its quantity. Thickly grate the apple with the skin ( it came to about 1 cup ) and immediately add to a pan and saute it till the moisture is completely gone.


         Now add the sugar and keep mixing on reduced heat, the sugar makes the apples once again watery. Saute it till the moisture completely disappears and the apples are completely cooked.


          Now add half the milk and keep mixing, the milk will start to curdle, just keep cooking till once again the mixture thickens. Remove it and cool both the apple mixture, elaichi powder and the remaining reduced milk. When completely cooled, mix them together, add the chiroli seeds and serve it chilled.


Note
Choose apples that are really sweet, and add sugar as required.
If you don't like or can't find chiroli seeds, replace it with some sliced almonds.
While serving if you find the kheer very thick, just add in some more milk.
reade more... Résuméabuiyad

Bottle Gourd Halwa, Sorakkai Halwa, Doodhi Halwa, Lauki Ka Halwa


          Since everybody is in a festival mood in India, celebrating Navarathri, thought I'll post a sweet recipe today. I regularly buy bottle gourd/ sorakkai/ lauki and everytime I usually make a subzi, curry or kootu with it, a side dish to go with rotis and rice. This is the first time I tried a sweet, a halwa with it, I haven't tasted this before so I didn't have any idea about it, but then, when I tasted the first spoon, I can tell you this, it was awesome, above all my expectations, simply too good..

Need To Have

  • Grated Bottle Gourd - 11/2 cups
  • Sugar - 3/4 cup
  • Milk - 3/4 cup
  • Ghee - 21/2 teaspoons
  • Corn Flour - 1 tablespoon
  • Cardamom/ Elaichi Powder - 1/2 teaspoon
  • Cashew Pieces - 1 tablespoon

Method


          Heat 1 teaspoon of ghee, add the cashew pieces, saute till golden, remove and keep. Add another 1/2 teaspoon ghee to the same pan, add the grated bottle gourd and saute for 3 to 4 minutes.


         Then add the milk and cook uncovered on reduced heat till all the milk is absorbed and the bottle gourd is cooked. Now add the sugar, corn flour mixed with little water, keep stirring and cook till it comes to a jam consistency.


          At this stage add the cardamom powder and the remaining 1 teaspoon ghee, mix it for a few seconds. Remove, add the cashew pieces, mix and serve warm or cold.


Note
Use bottle gourd which is tender and doesn't have much seeds, remove the seeds if any.
This halwa tastes good with this amount of sugar, if you like it less sugary, then reduce by a tablespoon.
I like my halwa warm, but it tastes equally good when chilled and can be refrigerated for at least 4 to 5 days.
reade more... Résuméabuiyad

Eggless Ferrero Rocher Tarts


          Last two months, I was not able to take part in the Eggless Baking challenges, I missed those wonderful bakes, but I am going to try them later. This month no matter what,I was determined to do it, and we had a superb challenge for this month, Eggless Ferrero Tarts ( known as such, since the Ferrero Rocher chocolates was the inspiration for these tarts ), it was suggested by Priya Srinivasan of Enveetu Kitchen, you can check out the original recipe at Trissalicious. It involves a couple of steps, baking the tarts, making the tart fillings and finally assembling the tart. Though it may sound and look like a lot of work, it was not a difficult task, I totally enjoyed doing it and of course eating it too, my family simply loved it..

Need To Have
For the Tart Base

  • All Purpose Flour/ Maida - 1/2 cup
  • Cocoa Powder - 2 tablespoons
  • Caster Sugar - 2 tablespoons
  • Butter - 4 tablespoons
  • Curd/ Yogurt - 2 tablespoons
  • Baking Powder - 1/4 teaspoon
  • Salt - a very small pinch

For the Walnut Praline

  • Roasted And Chopped Walnuts - 1/2 cup
  • Sugar - 1/4 cup
  • Water - 2 tablespoons


For the Hazelnut Mousse

  • Milk - 3/4 cup
  • Vanilla Custard Powder - 2 tablespoons
  • Nutella - 2 tablespoons
  • Fresh Cream - 1/4 cup
  • Confectioner's Sugar - 1 tablespoon
  • China Grass/ Agar agar - 4" long and 2" wide piece
  • Water - 3 tablespoons

For the Chocolate Hazelnut Thing

  • Milk Chocolate - 8 square pieces
  • Nutella - 11/2 tablespoon
  • Dark Chocolate Chips - 2 tablespoons
  • Walnut Praline - 4 teaspoons
  • Oil - 1/2 teaspoon


Method
Tart Base


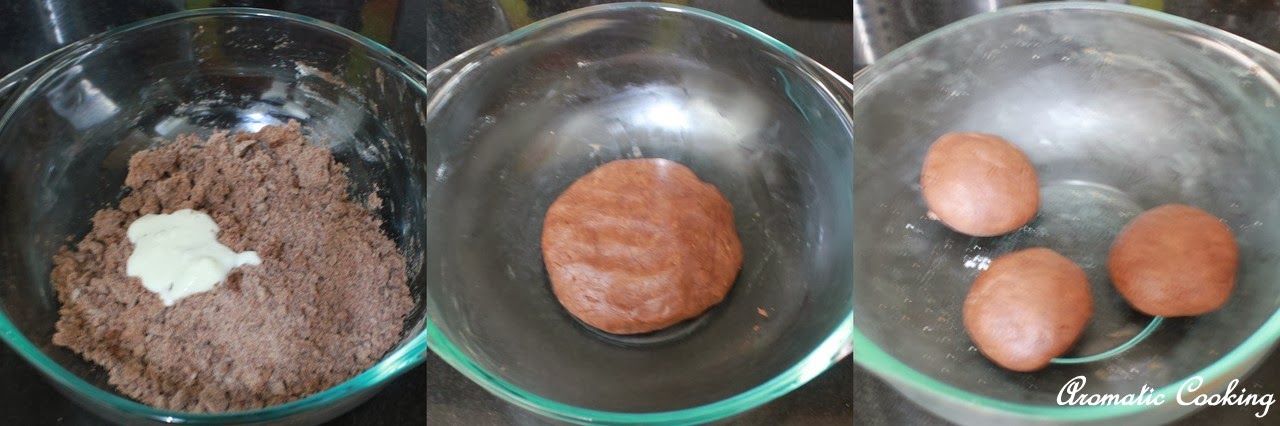
          Take the butter, cocoa powder and sugar and mix it well, I did it by hand. Then add the flour and baking powder and mix it again.


          Finally add the curd and bring it together into a smooth dough, refrigerate it for an hour.


          After and hour, take it out and roll it out into discs that are 2 mm thick, I used tart pans that measures 4.5 x .75, so I divided the dough into 3 parts and rolled out the discs ( the discs have to be a little bigger than the tart pan ). Place the discs in the tart pans and refrigerate them for an hour. Remove, prick it lightly with a fork and blind bake it for 10mins at 180C. Blind baking is nothing but, placing a piece of parchment paper on top of the dough in the tart pan with some beans like chickpeas to hold the paper and baking it. After 10 minutes, remove the parchment paper and beans and bake the tarts for another 10 to 15 minutes till done. Cool it and top it with the fillings.

Walnut Praline


          Take the sugar and water in a pan and bring it to a boil. When it starts turning a slight amber/ honey color add the walnut pieces.


          Mix and remove immediately and spread it on a plate lined with a parchment paper. Let it cool completely, then pound it lightly with a pestle and keep.

Hazlenut Mousse


          Mix the custard powder with 1/4 cup milk, heat the remaining 1/2 cup milk. Remove the milk from the stove and mix in the custard mixture. Then put it back on the stove and mix briskly for another 2 to 3 minutes till it thickens like a porridge, remove and cool it.


          Take the fresh cream and confectioners sugar and whisk it well till you get stiff whipping cream.


          Take the china grass and water and heat till the china grass completely dissolves in the water.


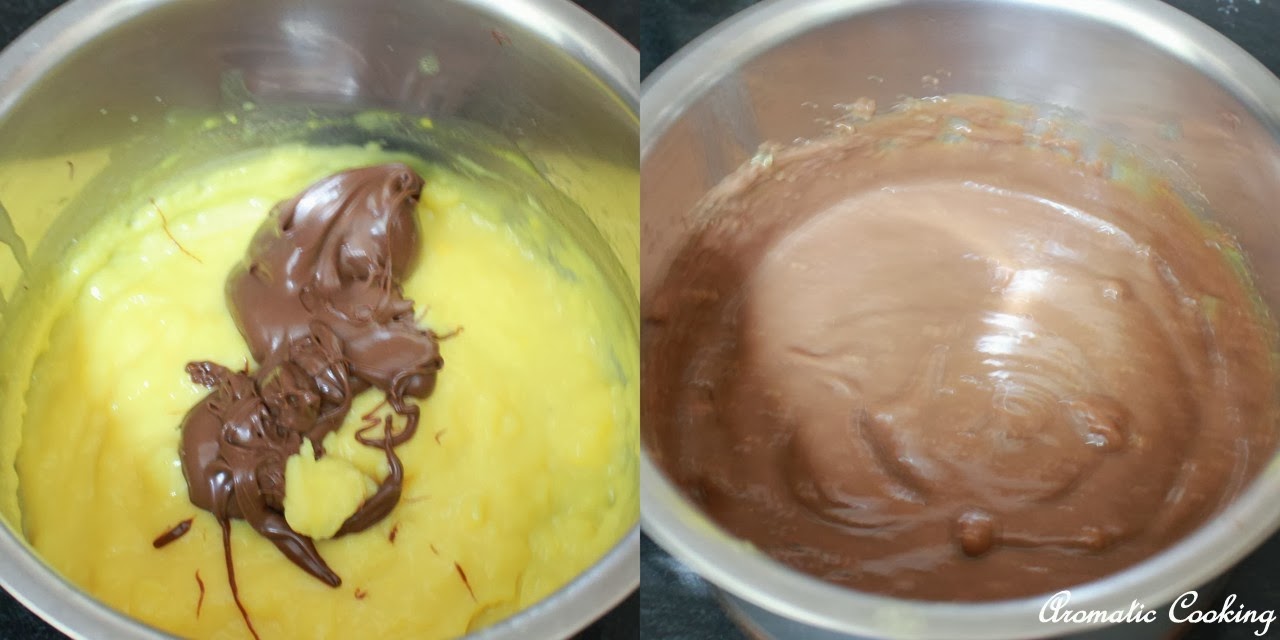
          Now add the nutella to the custard and mix it well, I used the electric beater.


          Then add it to the whipped cream and mix it well. Finally add the china grass and mix it properly and refrigerate it for at least an hour.

Chocolate Hazelnut Thing


          Take all the ingredients in a bowl and microwave it till the chocolate melts, mix and keep.

To assemble the Tarts
          Remove the tarts from the tart tins, pipe a layer of the Hazelnut Mousse, top it with the Chocolate Hazelnut Thing, sprinkle some walnut praline and serve.


Note
The original recipe used hazelnut praline, I have used walnuts instead.
Baking time varies, depending on the size of the tarts and the oven.
I have used 2 tablespoons of curd to make the dough, add more or less as required to mix the dough.
While making the praline, watch out carefully for the amber color and do the next steps swiftly, and be careful while handling the hot mixture.
reade more... Résuméabuiyad

Paal Payasam/ Milk Pudding


          Paal Payasam, it's one of the easiest and delicious desserts. The alternate name, Milk Pudding can be slightly misleading, because the preparation is totally different from that of a pudding. I had made this for my husband's birthday, he likes milk based desserts, and of course this is the simplest one. Though the ingredients required for Paal Payasam and Rice Kheer are the same, they taste different, mostly because of the different variety of rice used, still they both are delicious in their own way..

Need To Have

  • Raw Rice - 1/4 cup
  • Milk - 1 1/2 litres
  • Sugar - 1/2 cup + 2 tablespoons
  • Cardamom/ Elaichi - 6
  • Saffron - 2 - 3 pinches

Method


          Pressure cook the rice with a cup of water till really soft and mushy. Powder the cardamoms along with the 2 tablespoons of sugar, sift to remove the skin part of the cardamoms, which is not powdered well. In a heavy bottomed pan, boil the milk and simmer till it's reduced to 3/4th its quantity.


          Now add the cooked rice and mix it well. Then add the 1/2 cup sugar, cardamom powder and the saffron. Simmer, while stirring in between for another 5 to 10 minutes. Remove and serve it warm or cold.


Note
I had added all the cooked rice, reserving about 1/2 cup of it. You can add the entire quantity too, depending on how thick or thin you want the payasam.
An easy alternative to boiling the milk is, use 2 cans of fat free evaporated milk, just heat it, add the rice and proceed, it's even more delicious.
reade more... Résuméabuiyad