Pages

.

Spinach & Feta Cheese Puffs


         Again this is another dish that I had made before leaving to India. I had a box of feta cheese and a sheet of puff pastry that I had to finish up, since my daughter is a big fan of puffs ( which is nothing but puff pastry with some filling), I made this. It's a simple recipe, very easy to put together, but nevertheless very tasty and a perfect appetizer or starter..

Need To Have

  • Puff Pastry - 1 sheet
  • Onions - 2
  • Chopped Spinach - 1 cup
  • Potato - 1
  • Feta Cheese - 2 oz
  • Red Chilly Flakes - 1/2 teaspoon


Method
          Thaw the puff pastry sheet and boil the potato. Heat some oil, add the chopped onions, saute till transparent, then add the chopped spinach and the chilly flakes. Keep sauteing till the spinach wilts and the water dries up. Peel and mash the potatoes slightly, add it to the spinach, mix well. Now remove from heat, add the feta cheese, check the salt and spice level, cool it completely. Preheat the oven to 400F. Now, dust some flour and spread out the puffy pastry sheet, using a rolling pin, roll it out a little. Cut it out into 20 little squares, place the filling on one side of the square and fold the other side over it (it will be in the shape of small rectangles). Arrange them on a baking pan, leaving a little space in between and bake them for 15 minutes. Serve them warm with some tomato sauce.
Sending it to Cooks Joy for Srivalli's Kids Delight - Evening Snacks/Tiffin event,
                to Tickling Palates for the I Love Baking event and
                to Daily Cuppa for Vardhini's Bake Fest event.

Note
You can leave out the potato.
Can fold the sheets into small triangles.


reade more... Résuméabuiyad

Braided, Savory Corn & Coriander Puff..Step by Step


Hello Everyone!
Last few days were very hectic with the school reopening after the break. Immediately after the school reopened, the kid celebrated his twelfth birthday. So, the days were spent planning and shopping for his special day and I must tell you he had a great day, the details of which I’ll post later. But in all this hustle bustle, I was not able to make something interesting for Kalyani’s MM#6 using Coriander and APF. I had thought something very interesting and innovative in my mind but I was just not getting the time to incorporate it in my cooking, since what I wanted to make, needed some time in hand…

Finally today, I decided to make it. After S and the younger kid left for office and school respectively, I let the elder one sleep longer and finished all the cleaning and other chores before he got up. I must confess, I can be a fanatic at times when it comes to cleanliness. Then I did all the chopping, grating and kneading required for the preparation. By that time the elder one was up, so gave him milk and breakfast and then headed towards finishing the product.

DSC_1838-001

This preparation is inspired by my braided breads, which one can read in detail here and here. I love the beauty of the braids and I wanted to use the theme in a  savory preparation especially as a starter. This preparation requires a bit of patience as well as diligence but the end product is worth all the effort, it looks really beautiful and is very tasty. I have added no overpowering spices to the filling, it has all the flavors coming from the herbs and the fresh ingredients used.
This Puff can make a very attractive starter as well as an after school snack. I must confess, after a long time I deep fried and enjoyed eating it too..yes, all the health consciousness was thrown out of the window today..Winking smileI asked the elder one to sample the preparation after I fried the first puff and I got an instant Thumbs up. I was mighty delighted with his reaction! As a cook, my motivation comes from the feedback I get and when the effort gets appreciated, one thrives for more..Finally, when I served the puff to the younger one after he came back from school, after tasting he told me Mom, this is Chef’s stuff! Whatever you have put inside the puff, has amazing taste. It’s KOOOL Mom!!! Wow, the kids made my day trulySmile.

Braided Savory Corn & Coriander Puff

P1080174-001

Preparation Time:20mins

Standing Time for THE Dough:60mins

Cooking Time:10mins

Frying Time:20-25mins

Makes:8Puffs

Serves:4


Ingredients For The Dough

1cup APF
1tbsp oil for shortening
1-1/2tsp chili flakes
3/4tsp oregano
salt to taste
water for kneading

Ingredients For The Filling

2tsp oil
1carrot-grated
1/4cup sweet corn, crushed
one quarter of red capsicum, chopped finely
2garlic cloves
a piece of ginger
2green chilies
a handful of coriander
salt to taste
1/2tsp oregano
2medium potatoes, boiled and mashed or 1cup potato flakes mixed in 3/4cup water

Ingredients For Corn Starch Slurry

3tbsp Corn Starch
2tsp water
a pinch of salt
also
3cups Oil for Deep frying

Method For Making The Dough

Assemble all the ingredients for making the dough.

P1080137

In a deep bowl, mix oregano, salt, oil and chili flakes.

P1080138

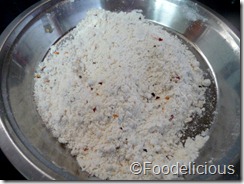
Add flour and mix to get a crumbly texture.
P1080140

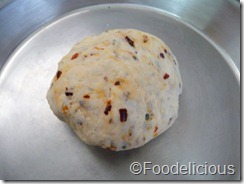
Add water gradually and knead a stiff dough. Let it rest covered for an hour.
P1080141

Divide the dough into 8-9 portions and make balls of size slightly larger than what’s required for making a poori, flatten them. Keep covered to avoid drying.

P1080158

Method For The Filling

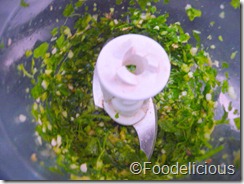
Crush together the garlic, green chilies, ginger and a little coriander in a hand mixer.

P1080142P1080143P1080145

Heat oil in a pan.

P1080146

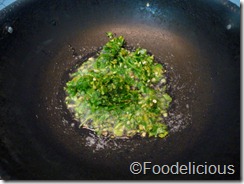
Add the ginger-coriander crush and saute lightly for a minute.
P1080147P1080148

Add the grated carrot, crushed corn and mix. Saute for a minute again.

P1080149P1080150P1080151

Tip in the oregano and salt.

P1080152

Add the capsicum and mix.

P1080153

Add the potatoes, I used the potato flakes as I find them handy to use. Mix thoroughly. Do not overcook, let the veggies have a bite, as they will be deep fried later.


P1080155P1080154

Cool the mix and finally chop all the remaining coriander and mix it in the filling.

P1080156P1080157

Divide into 8equal portions and shape them as elongated cylinders.

P1080161

Method For Corn Starch Slurry

Mix all ingredients under the heading of slurry to make a semi thick slurry.

P1080159P1080160

Method For Making The Puff

Take the dough ball and roll it into an oval shape of length 3-1/2-4inches.

P1080163

Score it lightly using a sharp knife 1cm,on either side of the center.

P1080164

Place the filling.

P1080165

Give slant cuts on either side of the filling at equal distance till the end.

P1080166

Spread the corn starch slurry on the filling. This will help to stick the braid.

P1080167

Lift the first cut on the RHS of the filling and place it’s end at the origin of the second cut on LHS. Stick properly. Now lift the first cut on LHS and stick it at the origin of second cut on the RHS. Repeat this process continuously till the braiding is complete. Press the ends lightly to avoid any gaps.

P1080170P1080171

Deep fry the braided puff on a low flame till golden and crispy. Remove on a kitchen towel to remove excess oil.

P1080172

Serve hot with tomato sauce.


Tips & Precautions

The shortening added to the dough should not be less or excessive, it should be just enough to get a crumbly texture. Less shortening will cause soft puffs and more shortening will cause excessive absorption of oil.
One can try different fillings in the puff but the filling should not have excessive moisture.
Always keep the dough covered with a damp cloth, else it will start drying up.
Do not roll the dough too thin as it will tend to break while braiding.
The slurry should not be made thin as it will cause addition of water to the dough, making it further soft.
While adding salt to the filling, keep the salt level slightly less as the outer cover also has the salt, else the puff will become too salty.
This post goes to Magic Mingle#6
reade more... Résuméabuiyad

Black-Eyed Peas & Pineapple Salad


        With the hot weather outside, you don't feel like eating anything heavy, salads seem to be perfect for these days. I had some cooked black-eyed peas, made a salad with it along with some pineapple and cucumber, it is a very refreshing salad, wholesome enough for a light lunch..

Need To Have
  • Cooked Black-Eyed Peas - 1/2 cup
  • Chopped Cucumber - 1/2 cup
  • Chopped Tomatoes - 1/4 cup
  • Pineapple Pieces - 1/4 cup
  • Lime Juice - 1/2 teaspoon 
  • Chopped Coriander - 1 tablespoon
  • Salt & Pepper - to taste


Method
          Mix together the black-eyed peas, cucumber, pineapples, tomatoes. Add the lime juice, salt and pepper and serve garnished with the coriander leaves.

Note
Serve it as a cold salad or even as a salsa or dip with some corn chips.
Can also add some chopped green chillies for more spiciness.
reade more... Résuméabuiyad

Ankurit Kadve Vaalachi Usal & Jowar Roti..Lablab bean curry and Sorghum Bread


DSC_1781

Hi!

Those who are regular readers to my blog can sense my health freak attitude these days. Yes, I’m undoubtedly, now a days very health conscious and calorie conscious.Junk food is a complete no, no, except on very rare occasions. I’m just back from a small vacation at S’s hometown, where I attended my nephew’s Munji (thread ceremony) and S’s friend’s wedding. So, I do not have to tell you that for a few days I did over indulge but to my delight, after returning back, it did not show on my weighing scale.
One can also read in my blog, my insistence on making Jowar Rotis these days. Jowar/ Sorghum is a grain with low glycemic index and is gluten free. I prefer to make these instead of wheat chapatis now a days. These can be tricky to make initially but with regular practice they are fun to make and obviously healthy too.
Here, I must tell you that there’s a basic difference between Bhakari and Roti. Bhakari or commonly called farmer’s bread are made with pure or mixed grains flour, are slightly thicker and coarser than rotis. Water is applied on one side while roasting them. These puff partially and  are traditionally hand patted but one can use plastic sheet for easing the process. Typically the bhakri is eaten with Jhunka or Pithla. A bhakri is thick enough to be used as a plate. While a roti is much thinner and can be made using the pure flour or adding some wheat flour for convenience. These can be hand patted too or can be rolled using a rolling pin. These puff completely.

Vaal is a very commonly used legume in Maharashtra, it is brown in color with a white line running through it’s one edge. It is seen in various varieties and one version is bitter in taste, called the ‘kadave vaal’ where ‘kadave’ means bitter. I do not know why it’s called kaduve because I hardly find it bitter..

I sprouted the legume (vaal) for making it further rich in protein. Eating a high protein diet is recommended in a good diet that helps build muscles and reduce fat in the body. The combination of Vaalachi Usal and Jowar roti is very rustic with earthy flavors and I simply love the rustic nature of this dish. The sprouted vaal can be peeled by placing them in warm water or else eaten without peeling. I’ve not peeled ..

Kaduve Vaalachi Usal/ Lablab Bean Curry

Sprouting Time:15-20hrs

Preparation Time:30mins

Cooking Time: 15mins

Serves:3

DSC_1779

Ingredients For Vaal Curry

2cups steam cooked sprouted vaal/lablab beans
2medium sized onions, chopped
2tomatoes, chopped
2-3garlic cloves, chopped
3-4 green chilies, chopped
a large pinch asafetida/heeng
1/2tsp turmeric pwd
3/4tsp red chili pwd
3-4 kokam/ dry mangosteen
4-5tsp oil
1/2tsp mustard seeds
1tsp chopped coriander stems
1/2tsp goda masala

Method For Vaal Curry

Pressure cook the sprouted vaal.

P1070788

Heat oil and splutter the mustard.

P1070791

Add heeng, chopped garlic and green chilies.

P1070795

Tip in the chopped onions and saute till light brown in colour.

P1070796P1070797P1070799

Add the tomatoes,saute.

P1070800P1070801

Add turmeric and red chili pwd.

P1070802

Add the salt to taste.

P1070803

Cook till the tomatoes are mushy.

P1070804

Add cooked vaal, mix.

P1070805P1070806

Pour about a cup of water and mix. Add chopped coriander stems and mix.

P1070807

Add goda masala and stir.

P1070808

Finally add kokam and boil on low flame for 8-10mins.

P1070809P1070810


Serve hot with rice or Jowar Roti.

Jowar Roti/Sorghum Indian Bread

Preparation Time:5mins

Cooking Time:15-20mins

Makes:8 rotis

DSC_1791-001

Ingredients

3/4 cup Jowar/Sorghum Flour
1/2 cup Wheat Flour
a pinch of salt
warm water for kneading

Method For Making Jowar Roti

Mix both the flours, add salt and knead a soft but firm dough using warm water. Once kneaded, knead more for about 5mins. This roti can also be made only with Jowar/Sorghum flour but with the store bought flour, making roti is a bit difficult, so for convenience, wheat flour is added.

P1070965P1070966P1070967

Take a large marble size dough and knead it lightly again.

P1070968

Roll it lightly by applying less pressure with the help of sorghum flour to a 5inch disc. Seal the edges if any 
cracks appear.

P1070974

Put it on a hot griddle and flip immediately before it’s half cooked.

P1070975P1070976 

Cook the other side properly till light dark spot appear, at this point flip the roti.Once flipped, the roti puffs. Once puffed, remove.

s

Make all rotis in the similar fashion. Serve hot. Before serving apply ghee/clarified butter.

DSC_1792-001
reade more... Résuméabuiyad