Pages

.

A Very Deceptive- Stuffed Bittergourd

P1000563 You can see people making faces the minute they hear the name Bittergourd. It is not a very popular vegetable amongst kids and even elders. In my family S loves eating the gourd but for all the three of us,it’s a bit painful. If it tastes slightly bitter also we do not like to eat it. I try all the means to remove the bitterness to make it eatable.
This time when I made the bittergourd it was not at all bitter and every body ate it gladly without any fuss. For this I must thank Prathibha from Chef and her Kitchen. I was actually inspired by her post and hence tried attempting it. I am indeed happy I tried it as I found a way to the Bittergourd for my family. We all know that in spite of all the problems we might face eating this gourd it has high medicinal value..worth taking all the pains!
Earlier when I cooked the Gourd I used to apply salt and then leave it for 2-3 hours, then squeeze out all the water and wash it many times with water to remove the bitterness and to a large extent the bitterness was removed. Some people apply curds to remove the bitterness. Prathibha had asked to boil the Gourd in water along with salt, tamarind juice and jaggery, which does the trick..it saves time and extracts all the bitterness. I did not add the jaggery as we are not very fond of the sweet taste in our subzis. I modified the stuffing also to a certain extent to add in more flavors .
So for those who have avoided bittergourd for so many days it’s time you try it again and taste it, and for the gourd lovers…I know you will try.
Ingredients
4-5 medium sized bittergourd
1 small onion sliced
2 tbsp chickpea flour (besan)
2 tbsp bengal gram (chana dal)
1 tbsp split black gram (urad dal)
1 tbsp coriander seeds
1 tsp cumin seeds
1-2 tbsp thick tamarind extract
1/2 tsp turmeric
1/4 tsp peppercorn
3-4 cloves
1/2 inch stick cinnamon
5-6 red chilies
2 pods of garlic
salt to taste
1 1/2 tsp amchoor
oil for cooking
Method
  • Cut the edges of the bitter gourd. Make a slit in the centre and scrape out the hard seeds.P1000556
  • Boil water and add salt, tamarind and turmeric. Add the bittergourd and cook till half done, remove from water and cool.
  • Heat a spoon of oil and roast the besan till it releases a pleasant smell.
  • Heat 1/2 tsp oil and saute the onions and garlic, remove them. Heat another spoon of oil add both the dals and saute till light brown in colour. Add cumin, coriander seeds, cloves, cinnamon, pepper corns and red chilies. Roast them for 2-3 mins on low flame. Cool the mix.P1000557
  • Grind together onion and the mix . Add it to the besan and mix in amchoor and salt to taste.P1000558
  • Fill in the stuffing in the bittergourds, heat oil and saute gently the gourds. Cook it on low flame till the outer crust is nicely crispy.
  • Serve with hot rice and dal along with some ghee on the top.
reade more... Résuméabuiyad

Khaman Dhokla- Indian Cooking Challenge

P1000590 This is my first month of Indian cooking Challenge and the second event of ICC started by Srivalli of cooking4allseasons. I am all set to try out our traditional Indian recipes each month. This month’s challenge was Khaman Dhokla.
Khaman Dhokla is a traditional delicacy from the region of Kutch in Gujarat. It is a steamed salty cake made from chick pea flour.
I have earlier made instant Dhokla a lot of times which can be made in a jiffy. This method of making Dhokla which was given to us required an hour of standing. It is flavored with ginger and green chillies adding more flavors to the Dhokla.
The method of cooking is steaming and needs very little oil only for the tempering, making it a healthy and light snack to eat. I made the Dhokla in the evening and saved it for the next day school lunch boxes as both the sons are very fond of the Dhokla. The Dhokla turned out to be soft and moist. One should be careful about the texture of the Dhokla as the dry Dhokla gets stuck in the throat and is difficult to eat.
I followed the entire method and ingredients as mentioned by Srivalli. I made only two simple changes 1. I added asafoetida in the Dhokla as its good for digestion, especially if it’s chickpea flour and plus it gives a good flavour 2. I added about half cup of water to my tempering instead of the 3 spoons mentioned as I have been doing it earlier also and I knew this will keep the Dhokla very moist.
P1000586
Ingredients
For Batter:
Bengal Gram flour / Besan - 250 gms (1 & 1/2 cup)
Curd - 1/2 cup (not very sour)
Water - 1/2 cup
Cooking Soda - 1/2 tsp and Salt to taste
1/4 tsp asafoetida
For seasoning to be mixed to the batter (to be added just before cooking)
Oil - 1 tbsp
Turmeric a pinch
Green Chili paste - 3 long (as per taste)
Ginger – 1 tbsp grated
Sugar - 1 tsp
Citric acid – 1/4 tsp

Eno - 1 packet/ 1 tsp (green colour fruit lime) + sprinkle or dust few bits on the plate
For tempering
1 –2 tsp Sesame seeds
2 tsp Mustard Seeds
Few Curry leaves
2-3 tbsp Coriander leaves
3-4 green chilies sliced
1/2 cup water
and 3 tbsp oil
P1000587
Method
  • Mix first 1/2 cup curds with 1/2 water. To this add the chickpea flour and mix well to get a lump less batter, the consistency should be of Idli batter i.e more of dropping not pouring consistency. Slowly add more water if needed else, asafoetida and soda. Keep it aside to rise for 1 hour.
  • If you are using a pressure cooker, fill the pan with water, place a plate over which you will have use a plate for steaming the dhoklas. Thali plate can be used for steaming. I used the cooker containers.
  • To the batter mix in the citric acid, oil, salt, sugar, green chili , ginger paste and turmeric powder. Mix well. This has to be done just before pouring to the plate.
  • Put the pressure cooker on stove, and let the water start boiling. When the water reaches the rolling stage, you can mix the eno to the batter (Save a little of Eno for dusting on the plate), mix gently, you will see bubbles coming out.
  • Grease the plate/container. Dust or sprinkle the plate with Eno. Then immediately pour the batter to the container. Place the container carefully inside the pressure pan and cover with lid. You need not use the weight/whistle. After covering you will find steam coming out of the outlet, simmer and don't disturb for almost 5 -7 minutes.
  • After 5 -7 minutes, remove the lid and proof it using toothpick or knife. If the knife comes out clean and does not have any batter sticking, then its done. Cover back and let it cool down for about 4-5 mins.
  • In a pan heat oil add mustard, sesame, sliced green chilies and curry leaves. In another container boil 1/2 cup water and pour this to the oil and cover the pan immediately and switch off the flame.
  • Cut the Dhokla into diamond shape in the container.
  • Pour this tempering on the cut Dhokla and garnish with chopped coriander. I avoided adding coconut as the temperature here is really high and coconut gets spoilt easily.
  • Serve with sauce or green chutney.
reade more... Résuméabuiyad

Bread Rolls- II (Stuffed Potato Bread Rolls)

P1000606 Ever since I made Cheesy Bread Rolls for my son’s birthday S , like a kid has been after me that I did not made his kind of bread rolls and when was I going to make them? S can really be a child when he wants to eat something desperately. But I love to pamper my ‘Sweet Old Child’. I promised him for the weekend, but we got stuck finishing a lot of pending chores and I was unable to make them. I promised him again that I will make them sometime in the week, but my Sweet Old Child wanted me to make a lot of them for the dinner.
So I made the bread rolls for the dinner along with mixed veg soup to make a wholesome meal. I kept the rolls ready in the afternoon and kept in the fridge and fried them just before serving dinner. I was glad he liked them and the best part about the rolls was they did not absorb the oil. S kept asking me what have you done to the bread rolls that they have not absorbed the oil? My only answer to him was just made them with lot of love.The real answer probably was I did not soak the bread in water directly, instead I just patted enough water on it to make it soft enough to fold.
Ingredients
16 fresh bread slices
5-6 medium potatoes
1 medium onion chopped
3-4 green chilies
an inch of ginger
4-5 garlic pods
3 tbsp chopped cilantro
1 tsp cumin pwd
2-3 tsp coriander pwd
salt to taste
2 tbsp chaat masala
1 tsp white pepper pwd
P1000604
Method
  • Boil the potatoes, peel off the skin and grate it.
  • Crush together garlic, ginger and chilies.
  • In the grated potato add the crushed paste of ginger-garlic . Add chopped cilantro & onion, salt, chaat masala, cumin , coriander & white pepper pwd.
  • Mix all so that the spices blend in the potato.
  • Divide potato mix into 16 equal portions.
  • Trim the edges of the bread and roll it flat with a rolling pin.
  • Take the bread on the palm and spread water on the edges and the entire bread, just enough to make it soft.
  • Keep the potato mix in the centre and fold the bread over it from all the sides.
  • Press and give it a proper oval shape and deep fry in hot oil till nicely golden brown and crisp. Do not fry on low flame as the bread tends to absorb more oil.
  • Serve hot with Tomato sauce or green chutney.
  • Makes 16. I had saved a few for the lunch boxes as the rolls are very filling and kids eat them with 'no fuss'.
cooking for kids logo fried snack Sending this post as my entry to CFK- Healthy Lunch Boxes a monthly event started by Sharmi @ Neivedyam. This month it is hosted by Neha of easyntastyrecipes and to WYF: Fried Snack hosted by SimpleIndianfood.
Note- Be careful while adding salt as the chaat masala also contains salt.
reade more... Résuméabuiyad

Bottle Gourd in Milk & Coconut Gravy

Once again I am posting a bottlegourd curry. My readers might feel why bottlegourd again ?

Hmmm what do I reply...the thing is in North India we are facing acute shortage of water and electricity. The monsoons have got delayed and if the same condition persists for some more time ,the government will have to declare a drought situation ( all because of El Nino ). Because of that there is scarcity of vegetables and the prices are rocketing high even for the very basic onion and potato.


So being the homemaker it's right now my responsibility to make good food out of the vegetables available in the market. And bottlegourd seems to be seen with all the vegetable vendors. But somehow I am able to convince my family to eat it , probably they understand my plight or I might say I am a good cook :-).


When I made this curry S said there's a lot of coconut(he does not like vegetable with coconut) but the flavor (of garlic) is nice. Both the kids liked it ( they love the coconut and garlic). It's a curry with mild flavors of garlic and coconut absorbed in the milk , which gives a creamy texture to the curry. This is my father's favorite and I have learnt this from my mom who makes this quite frequently in her kitchen.


Ingredients


2 small bottle gourds - chopped

1/2 fresh coconut

3-4 garlic pods

1/2 tsp cumin seeds

1/2 tsp turmeric

3-4 guntur red chillies

1& 1/2 tbsp coriander seeds

1/2 cup milk

oil to cook

salt to taste

asafoetida - 1/4 tsp

mustard seeds-1/2 tsp


Method


  • Peel the bottle gourd.Deseed the bottle gourd if the seeds are hard and chop it.
  • Grind together coarsely coconut, red chilli, cumin,coriander and garlic.
  • Heat oil add mustard seeds, asfoetida and turmeric. Now add the bottlegourd and salt.
  • Add milk and mix. Now cover and cook till its almost done.
  • Just before removing it from the fire add the coconut mix and cook for another 2 mins.
  • Serve it with hot roti or rice.


reade more... Résuméabuiyad

Carrot Cake With Cream Cheese Frosting

P1000600
First of all a BIG THANKS to Rosie for sharing such a wonderful cake recipe with us. It’s truly a classic cake and now it’s my family favorite too.I am already waiting to bake it again. I just enjoyed making the cake. All the ingredients required are readily available in the kitchen except for the cream cheese and the Pumpkin pie spice.
The Cream cheese I got from the market but I had to google to find out a substitute for the Pumpkin spice as we do not get that here in India, and I was surely grinning when I was able to find a simple substitute (one small hurdle crossed).
The biggest hurdle was to put the frosting on the cake. I took the precaution of chilling the frosting for an hour before spreading it as the temperature here was soaring 39 C and the humidity as high as 85%, but nothing helped. The minute I applied the frosting on the cake it attained back the room temperature in no time and started flowing down. Though I loved the frosting but I will not use it again in this kind of temperature, but a ‘Must’ try for the winter.
P1000602
You can very clearly see in this click how my frosting was flowing down into a river. Nevertheless, I chilled the cake and then cut the slices. The minute I saw my first cut slice, all my anguish with the frosting vanished. The cake looked heavenly and with the first bite in my mouth I realised it tastes superb. The flavor of carrot and the Pumpkin spice complement each other, and together they give a rich flavor to the cake. The frosting’s perfect, adding it’s mild flavor, and the oil in the cake just makes it perfectly soft. The total flavor, one will surely not forget for a few days. I already have a demand to bake it again from the family.
Ingredients
I had reduced it to half of the original recipe
Substitute for Pumpkin Spice
1 1/2 tsp ground Cinnamon
1/2 tsp ground Nutmeg
1/4 tsp ground Cloves
1/2 tsp ground Ginger
- Mix all the spices and use 1/4 tsp for half portion of original recipe.
P1000591
How I Made The Cake
  • Sift all the dry ingredients together except the sugar.
  • Beat the egg and add oil to eat and beat again till light and frothy.
  • Add the brown sugar and beat till it gets mixed properly.
  • Add the grated carrot, chopped walnuts and raisins and mix well.
  • Keep adding the dry ingredients to the wet and mix it properly till both are well incorporated in each other.
  • Put in in a greased loaf tin and bake it in a preheated oven for 60-75 mins at 150 C.
  • Check with a skewer whether the cake is done.
  • Let it cool in the oven for 10 mins and then remove it from the loaf pan and let it cool on a wire rack for an hour.
For The Cream Cheese Frosting
Mix together 40 gms of Cream Cheese and an equal portion of softened white unsalted butter. To this add 1/4 tsp Vanilla Essence and 80 gms of Icing Sugar and mix. Chill the frosting for an hour (Not required in winter).
  • Apply the chilled frosting using a palatte knife on the cake. Spread it evenly and spread some sprinkles over it.
  • Chill the cake for another hour before cutting slices.
This is my entry to Sweet and Simple Bakes Monthly Baking Event co-founded by Rosie and Maria .
reade more... Résuméabuiyad

Garbanzo and Paneer Curry – A Protein Packed Meal For My 25th Post

P1000583
We all love to eat Garbanzo beans (kabuli Chana) but I rarely indulge cooking it for some unknown reason. Probably because it’s heavy to digest. This time when I started cooking the beans, instead of cooking the normal Chana masala I thought of giving it a little twist. In some of the Indian restaurants I had read Chana Paneer Masala in their menu, so how is that possible, that the cook in me will not get inspired and try making her own version!
I decided to make garbanzo with paneer. Both Garbanzo and Paneer are loaded with proteins, the nutrition conscious mom was happy for that and a little scared about the digestion. I did not want to make my dish overly spicy. I decided making a normal onion-tomato masala but keeping the spices minimum. The reason being I was expecting guests and I was not sure how much spicy they could eat. The kids, guests(they said they liked it) and S liked the end product, I personally wanted it more thinner which I had not done for the convenience of serving. But the next day I added a little more water ,salt and chili powder to it and relished my curry.
Before I tell you how I cooked the curry let me give you some additional information about the beans which i read at goodwithchildren.com.
Garbanzo beans are also referred to as chickpeas, Bengal grams, and Egyptian peas. They have a delicious nut-like taste and a texture that is buttery yet starchy and pasty. A very versatile legume, they are a common ingredient in many Middle Eastern and Italian dishes, such as hummus, falafel, and curries. Though most people think of garbanzo beans as being beige in color, some varieties are black, green, red, and brown.
Garbanzo beans are an excellent source of molybdenum. They are also a very good source of fiber, folic acid, and manganese. In addition, they are a good source of protein,which I have mentioned above also, as well as minerals such as iron, magnesium, copper, and zinc.
HEALTH BENEFITS A good fiber source, garbanzo beans can help lower cholesterol and improve blood sugar levels, making them a great food for diabetics and insulin-resistant individuals. Served with high-quality grains, garbanzo beans are an extremely low-fat, complete protein food.
Garbanzos also offer a good supply of magnesium and folic acid. Also found in garbanzo beans is molybdenum, a trace mineral needed for the body's mechanism to detoxify sulfites. Sulfite-sensitive individuals who are deficient in this trace mineral may experience headaches, racing heartbeat, or confusion.
Ingredients Required For the Curry
500 gms Garbanzo Beans.
4 medium onions roughly chopped
1 pack tomato puree
6-7 garlic pods
1 1/2 inch piece of ginger
200 gms fresh Paneer (cottage cheese)
Oil for cooking

Spices

4-5 tbsp coriander pwd
1 tbsp cumin pwd
1 tbsp amchoor pwd
1 1/2 tbsp anardana pwd
1 1/2 tsp turmeric
3-4 tsp red chili pwd
1/2 tsp Garam masala
1 tbsp kitchen king masala
2 bay leaves
2 green cardamom
1/2 tsp grated nutmeg pwd
salt to taste
How I cooked the Curry
P1000566
Wash and soak the Garbanzo in water overnight. Boil it in a pressure cooker for 6 whistles and then on low flame for another 10 minutes.
P1000565
P1000567
Grind the onion to a smooth paste. Heat oil in a non stick pan and add Bay leaves and cardamom. Add the onion paste and saute it till its brown in color.
P1000568
Add freshly crushed ginger and garlic. Saute till the raw smell disappears.
P1000569
Add the tomato puree and cook till the oil leaves the edges.
P1000570
P1000571
Add the spices and salt. Roast the masala for a few more minutes.
P1000572
Cube and add the paneer and mix it properly and gently in the masala.
P1000577
P1000576
Add the boiled Garbanzo and mix properly. Add water to adjust consistency. Bring the curry to a boil and simmer for 10-15 mins.
Serve it with Jeera rice or Paratha/Phulka/Naan
This lentil stew is off to MLLA-13 (My Legume Love Affair event) being guest hosted this month by lovely Sunshinemom (@ Tum Yum treats). MLLA is the brainchild of Susan @ Well Seasoned Cook.
reade more... Résuméabuiyad

Crunchy Mixed Vegetable Salad in Peanut Dressing


The word salad makes my mouth water instantly. Ever since my childhood I have always been fond of eating raw vegetables. My mom used to make various kinds of koshimbirs and raitas so that we eat more greens and veggies.


I was not exposed to the concept of dressings for a salad during my childhood, this concept I understood only after I went into my higher classes and I was exposed to a few cookery books available in the University Library. When I read about the various dressings which were very famous in the US and Europe, I realised my mom had also made all these dressings in some or the other variation but without adding the smart term ‘Dressing’ to her salads. After that for fun sake whenever my mom made a salad I used to give them nice English names.


When Pavani of Cooks Hideout announced JFI:Peanuts, I knew what I had to post. JFI – Jihva for Ingredients is the brain child of Indira of Mahanandi.


Peanuts are also called ‘Garibon ka Mewa’ meaning a rich food for the poor. There’s a scientific reason behind saying like that… Peanuts not only resemble the cashewnuts in their taste but are very rich in proteins (legumes), monosaturated fats, carbohydrates, vitamins, niacin, folate etc. So, they provide a complete nutrition at low cost.


Coming to my recipe as I have mentioned above, I knew what I had to make using the peanuts. This salad is a very favorite of mine. I remember eating the maximum share whenever my mom made this. It is just not simple & tasty but it’s healthily tasty. The addition of the crunch of roasted peanuts to the crunchiness of the raw veggies takes the salad to a different level. Make it to believe what I have said.
It needs very basic ingredients like
1 large tomato finely chopped
6-7 tbsp finely chopped cabbage
1 small cucumber finely chopped
6-7 tbsp nicely roasted and coarsely crushed peanut powder
2 green chilies very finely chopped
1 tbsp finely chopped cilantro (coriander)
2 tsp lime juice
3/4 tsp sugar
salt to taste
2 tsp oil
1/4 tsp cumin seeds


Method to make the Salad
  • Mix Cabbage, Tomato, Cilantro, Cucumber, lime juice and green chilies.
  • To the crushed peanut powder add salt, sugar.
  • Heat oil and add cumin seeds. Put the tempering on the peanut mix. The peanut dressing is ready.
  • Add the peanut dressing to the mixed veggies but do not mix. Chill for an hour then mix and serve immediately. (This will prevent the water to come out of the veggies)
  • This can be served along with the main course or can be a meal in itself if some one wants to indulge only in salads.

This is my entry to JFI- Peanuts August'09
reade more... Résuméabuiyad

The Sour and Spicy Bendekayi Gojju ( a hot and sour Okra)


I am posting yet another recipe from Karnataka and obviously taught by my MIL . Now 'S' being a Kannadiga loves it and will over eat the minute he realises it's something spicy and tangy. So when I told him I am making Gojju for the lunch, he was all set to come for it which he normally avoids in this heat.


Coming to the preparation, the header of the recipe itself explains that the dish is spicy and sour.To my understanding the Gojjus can be prepared in two ways, the first being the sour and spicy and the other version is slightly sweet and sour. Basically the Gojju could be sweet /spicy but it has to be very sour. The word Gojju means a sauce...a spicy tamarind sauce, this explains why the Gojju has to be sour.


This particular preparation demands for the 'Palya pudi' (masala for vegetables) which is readily available in a kannadiga's kitchen. If the Palya pudi is already made and vegetable chopped, it takes no time to make this Gojju. This particular Gojju can also be made using baingan (egg plant). It tastes best when served with hot rice and ghee.


Ingredients

For Palya Pudi


1/2 cup guntur chilli


1 1/2 cup bedagi chilli


1/2 cup coriander seeds


1/2 cup bengal gram (chana dal)


1/2 cup split bengal gram (urad dal)


2 cloves


4 big sticks of cinnamon (dalchini)


1 cup grated dry coconut


2 tsp oil


Method of making Palya Pudi
  • Heat 2 tsp oil and add cloves and cinnamon followed by both the dals. Roast them to a nice pink colour/ till they release an aroma.
  • Add the coriander seeds and roast till they are nicely crisp, now add chillies and coconut and roast for a few more minutes. Switch off the flame and keep turning the ingredients with a spoon for another minute.
  • While roasting be careful that no ingredient gets burnt in this process.


Ingredients For Bendekayi Gojju
1/2 kg of Okra ( washed and wiped dry)
5-6 tbsp tamarind pulp
4-5 tbsp Palya pudi
1 tsp turmeric pwd
1 1/2 - 2 tsp rice powder
few curry leaves ( optional)
2 dry red chillies
a pinch of asafoetida(hing) - optional
oil for cooking
1 tsp mustsrd seeds
salt to taste


Method of cooking Bendekayi Gojju
  • Heat oil add mustard seeds, followed by turmeric and bendekayi (Okra). Mix and add salt and tamerind pulp and cook till half done.
  • Add Palya pudi, rice powder and mix properly. Add about 1 1/2 - 2 cups of water and bring to a boil. Rice pwd helps bring a consistency of a gravy.
  • Cook till done, if required add more water if the gravy becomes too thick.
  • In a small pan heat a spoon of oil and add curry leaves, a pinch of asafoetida and 2 red chillies and pour this tempering over the gravy.Serve the Gojju with hot rice.

This is my entry to RCI Udupi & Mangalore , hosted by Sia of Monsoon Spice. This event has been originally started by Lakshmi of Veggiecuisine .
reade more... Résuméabuiyad
ASSEMBLÉE GÉNÉRALE

Mercredi 12 août 2009 - Salle de la Forestière

16 heures accueil
16 heures 30 Assemblée Générale statutaire
17 heures Débat avec nos invités
17 heures 45 Questions-Réponses avec M. Sammarcelli, Maire
18 heures 30 Remise du Prix CV Pierre Mazodier
18 heures 45 Apéritif ferret-capien

L’Assemblée Générale est ouverte à tous.

Venez nombreux
reade more... Résuméabuiyad

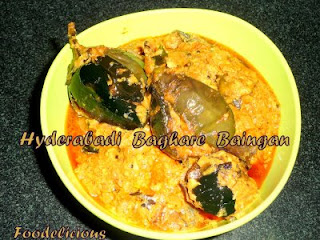
Hyderabadi Baghare Baingan, Stuffed Eggplant Version -I


Ever since I have started blogging my experiments in the kitchen are increasing day by day. I have started experimenting with the various Indian cuisines. Our country India has a vast treasure of various cuisines and I have just started my culinary journey to explore that. I have started it by experimenting with the tried, tested and the famous dishes.


One thing that I am doing regularly these days is dig into my diaries, in which I have been noting down countless recipes over the years, and I am using them in a real sense today. One such recipe which made me stop and experiment with is Hyderabadi Baghare Baingan.


I have always had Telgu neighbours since my childhood. Infact one of my such neighbours was Kumari aunty. She was an affectionate lady and both her children used to love me a lot. I used to be invariably at her place, so my lunch & dinner a lot of times used to be with them. Once it so happened, aunty was sending her kids off to school and I was feeling very hungry. She was not able to pay attention towards me, so the frustrated me went into her kitchen and opened one of her chutney jars and put my hand into it and started eating (I was just 3 yrs old). This was the famous ginger chutney into which I had laid my hand. I was crying and eating as I found it too spicy(poor mischievous me), fortunately aunty realised that I was in the kitchen and when she saw me, she rushed to call my mom. The gist of this entire story is that I realised at the age of 3 that hyderabadi food is SPICY.


The hyderabadi cuisine is slightly sour, spicy and richly endowed with the nuts and assorted spices cooked in ghee - has to be enjoyed to be believed. Sometimes slow cooking and Dum help produce rich flavors.

So here is how I made the Baghare Baingan.


What I Used


2 tbsp ghee
oil for frying
500 gms small Brinjals/Baingan/Eggplant
2 onions finely chopped
1 tomato finely chopped
1 small piece ginger
3-4 garlic pods
1 tbsp cashewnuts
1 tbsp coriander seeds
1 tbsp roasted peanuts
1 1/2 tbsp roasted sesame
1 tbsp roasted dry coconut
2 tbsp fresh coconut
2-3 tsp poppy seeds
1 1/2 tsp chili pwd
1/2 tsp turmeric pwd
1 tsp tamarind paste
salt to taste

For tempering

3-4 cloves
2 green cardamoms
1/2 inch piece of cinnamon
few curry leaves
1 tbsp ghee

How I made it

  • Make criss-cross slits in the baingan keeping the stem intact.
  • Deep fry the baingan.
  • Grind together poppy, sesame, coriander seeds, both the coconut, peanuts and cashewnuts to a paste using minimum water.
  • Heat ghee and add the chopped onions and saute them till light brown in colour.
  • Add the tomatoes, salt, red chili and turmeric powder.
  • Crush the ginger-garlic and add to the onion-tomatoes.
  • Saute till the raw smell of garlic disappears.
  • Now add the paste then the brinjals. Mix properly, add tamarind paste and a little water to get a good consistency. Bring it to a boil, cover and cook on low flame for 5-6 mins.
  • Heat a small pan and add a tbsp of ghee. Add all the tempering ingredients and pour it over the Baghare Baingan. Mix properly. Cook more for 2-3 mins.
  • Serve it with hot rice or roti/paratha.
This is my entry to FIL- Brinjal hosted by Sanghi.


This preparation is dedicated to my elder son . He relishes any preparation of stuffed Baingan I make.

Note-
This particular dish when I cooked , I did not make it too spicy as we eat medium spicy food. When S had it, his comment was 'Excellent taste but I think your story in the post is spicier than the preparation'. So those who love to eat very spicy food, add 10 more red chilies to your preparation.
reade more... Résuméabuiyad

Paneer Kaju Pasanda & Garlic Naan (An exotic meal for the kids)


The last weekend both the kids wanted to eat something special and their very commonly used statement is 'Mummy, make something nice'. And if you ask them what 'nice' do they want there will be no explanation to it. They want to eat something which they can call 'yummy food'. So this clueless mom started thinking what could make the kids happy. Hubby dear had demanded that he be served hot roti or paratha for the meal. I asked him how does the idea of Naan appeal him? And he just gave a broad grin.


If you remember, for my younger one's birthday I had ordered out, so this guilty mom has been compensating when ever she gets a chance. The menu was decided in my mind : Paneer and Naan, sounds good and makes everyone happy.

Now the next question in my mind was which Paneer recipe? If I asked the kids my elder one will be clueless (he always has a problem deciding, too many things that he wants) and the younger one will stick to Paneer Butter Masala (and we all are bored of this demand but as promised to him I have to make it some day).

So I decided to do some recipe hunt. I had a faint memory of reading Paneer Pasanda somewhere ...not able to recollect clearly I opened Sanjeev Kapoor's book on Paneer and I found what I had to make ...A rich Paneer Kaju Pasanda ..and this earlier clueless mother had all the clues now! I made some minor changes to the original recipe so as to suit our palate.

Since the recipe demanded all high calorie things like cashews, deep frying and cream, I decided to use a non-stick pan to 'Bhuno' my masala using minimum oil.

The end result was a big smile and praise from everyone and I was wondering why will it taste bad after adding so many goodies in it!

Do try it if you are in a mood to indulge in rich cooking... and we all do that once in a while and if not, surely do it for the kids as you will get showered with hugs and kisses for this cooking (so was I) and that's what is our reward.
Naan, I have made several times earlier, but every time I try a new recipe using the same ingredients in different proportions and the most commonly made substitution is that of wheat flour for all purpose flour.

The Naan available in restaurants is made completely from all purpose flour (maida). This is not very healthy to eat and it's only good to eat when hot. It becomes very chewy if not consumed immediately. I have found during my experiments with Naan that adding wheat flour not only is beneficial for health but it keeps the Naan soft after the cooking even if not consumed immediately, plus gives a very nice texture to it.

I added minced garlic to give a mild flavor of garlic to the Naan. Unlike the restaurants where the garlic Naan is too garlicky I made a milder version using minimum garlic... just to get a hint of garlic.
Here is how I made my Paneer and the Naan.

Ingredients you will need to make Paneer Kaju Pasanda

400 gms of Cottage cheese (Paneer) - cut into cubes
18-20 Cashewnuts


For the Onion Paste
2 medium onions roughly chopped
2 inch piece of coconut
1 inch piece of ginger
3-4 garlic pods
few coriander leaves (I did not use as coriander is not readily available these days)
5-6 Kashmiri Mirch
1 tbsp poppy seeds paste
1 tsp cumin seeds
1 tbsp coriander seeds
2 cloves
an inch of cinnamon
2 tbsp watermelon seeds (magaz)
Oil for shallow frying + 2 tbsp
1 cup tomato puree
1/2 cup cream
1/2 tsp sugar
salt to taste
1/2 tsp garam masala (can be omitted)
How I made the Paneer


Shallow fry the paneer and cashewnuts. Soak the poppy seeds in a little water for an hour and then grind it to make a smooth paste.

Grind all the contents of onion masala together with a little water. Heat 2 tbsp oil in a non stick pan and add the masala and cook it on low flame till the raw smell of onion disappears and the oil leaves the edges.

Now add the tomato puree ( I used the tetrapak version) and mix. Cook for 2 mins on high flame and then add about a cup of water.


Let the gravy simmer for a few more mins till the fat separates. Simmering is a process in which the liquid is not let to reach the boiling point and is cooked on low heat. This is important technique especially for making curries/gravies as the spices get nicely cooked and blend with each other on low heat.


Once the gravy starts realeasing it's aroma (check that, it will make you feel more hungry) add the paneer and cook for about 3 mins first on high and then on low heat.

Now add the cream (keep 2 tsp of it for garnishing) and garam masala (the original recipe does not ask for it), mix properly. Remove the pan from the flame.


Add the Cashewnut and garnish the curry with cream and its ready to be served with hot Garlic Naan.


Weekend Wokking: Cheese hosted by Yasmeen of Health Nut and Started by Wandering Chopsticks


I am sending Paneer Kaju Pasanda as my entry to


Ingredients needed to make Garlic Naan


3 cups of refined flour
1 cup whole wheat flour
8-10 chinese garlic peeled
1 tsp baking powder
1/2 tsp baking soda
salt to taste
1 1/2 tsp sugar
1 1/2 cups warm milk
2-3 tbsp yogurt
2 tbsp oil
3-4 tbsp butter


How I made the Naan


Sieve the flour along with the baking powder, soda and salt. Grind the garlic. Add the garlic (leave 2tsp to apply externally) yogurt and sugar to the flour. Now use the warm milk and knead a soft dough (if required used luke warm water). Apply oil and cover it with a wet cloth and leave the dough to rise for an hour or more (till it becomes double).
Punch the dough and divide it into 12-16 equal parts. Make balls and leave it to rise again for an hour.
Melt butter. Take each ball and flatten it on the palms and apply butter and then dust it with flour and then make balls again and leave them for 15 mins.


Press a few pieces of crushed garlic on the ball and then roll the balls into 6-7 inch circles of 1/2 inch thickness.Pull it from one side to give it a pear shape.

Heat a griddle. Apply water to the top of the rolled Naan and put this side on the griddle. Apply water on the other side also and then flip the Naan to roast it from the other side. Ensure that the griddle is not too hot. Smear some butter and serve hot.


The other way to cook the Naan is to bake it in a preheated oven at 250 C for 6-7 mins.


Of the two methods (Griddle and Oven) I personally like the Naan made on griddle. The Naan on griddle cooks fast and has a better texture and gives you the flavor of Naan made in the tandoor.


reade more... Résuméabuiyad